
- cnc
- woodworking
- warped board
- flatten stock
- surfacing
Warped Board CNC: Shim and Surface It Flat
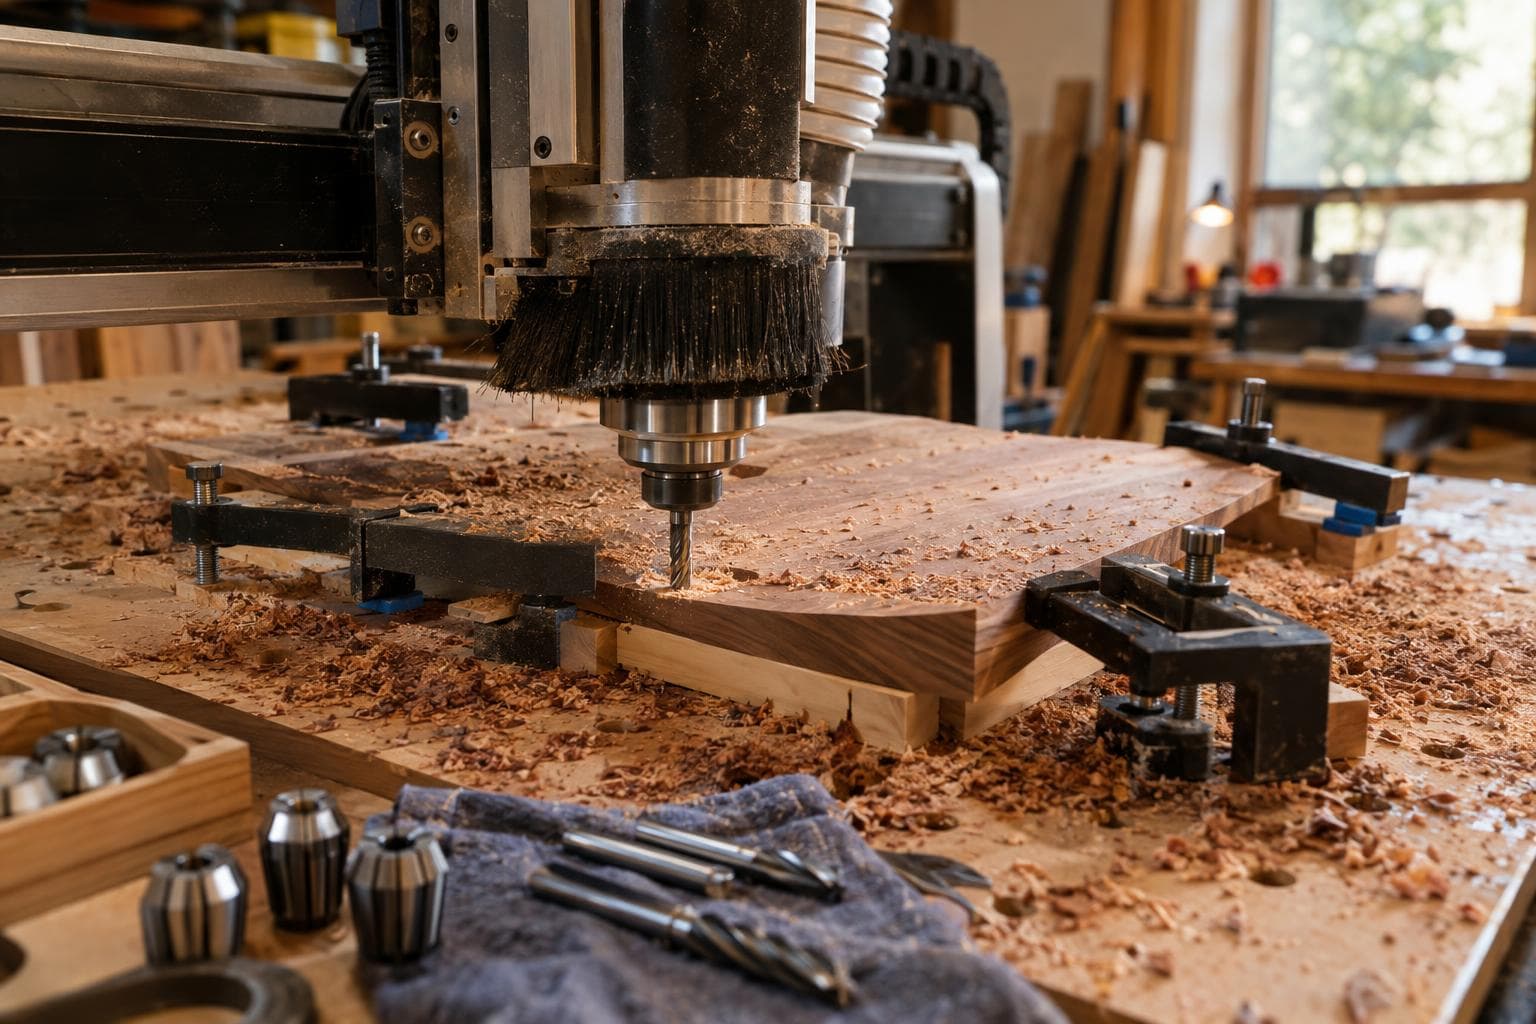
A cupped board can look flat under clamps and still produce a bad CNC setup. The short answer is to support the low spots, leave the board in its natural position, and surface the exposed high side rather than forcing the whole blank down.
Mistake 1: Clamping the cup out of the board
A clamp can make a warped blank appear usable while storing stress in it. Once the clamps come off, the board returns toward its original shape. A board clamped flat returns to its shape once released, so any cut made while it is restrained may no longer line up with the surface you intended to create.
The failure is easy to miss during machining. The first face may look acceptable, but the board moves after release. A second operation then sits at a different angle, a glued assembly develops a twist, or a thin section lifts enough to catch a cutter.
The check before machining
Release every clamp briefly after positioning the blank. Watch whether a corner rises, a gap opens under a straightedge, or the board rocks on the spoilboard. If it moves, treat the board as warped rather than accepting the clamped position as its working geometry.
For a one-sided sign, shallow carving, or a part where the back does not need to be parallel, clamping may be good enough. For a board that needs a flat reference face, it is the wrong starting point. We would rather spend time supporting the warp than cut a flat-looking surface into a stressed blank.
Mistake 2: Pressing down the low side instead of supporting it
The low side of a cup is not a reliable clamp target. Pressing it down changes the board's shape and can leave unsupported areas between clamps. Those areas may rise under cutting forces, especially during a heavier pass or near the edge of the blank.
The better setup is to place shims under the low areas so the board rests without rocking. The shims do not need to force the board into a new shape. They only need to close the gap between the board and the spoilboard well enough that the cutter cannot make the blank flex.
Use thin, stable material for the shims. Offcuts of the same board, hard plastic sheet, or paper laminations can work, depending on the gap and cutting load. A soft or compressible shim can change height during machining. A tall shim at one isolated point can also create a new pivot.
The check before committing the blank
With the clamps installed, press down by hand at several points around the board. There should be no rocking and no obvious spring when pressure is removed. Slide a thin feeler, strip of paper, or known-thickness shim under likely gaps and record where support is needed.
Then check cutter clearance. A shim that reaches too close to the toolpath can become a projectile or damage the cutter. Keep support outside the cutting area, or model the keep-out zones in the setup if the toolpath runs close to the edge.
Mistake 3: Assuming the spoilboard is flat enough
A warped blank can be blamed for a height problem that actually comes from the spoilboard. Dust under the board, a damaged spoilboard, an uneven sacrificial layer, or a machine bed that is not trammed can all make the top surface vary.
This matters because surfacing removes material from the high side rather than pressing the low side down. If the support underneath changes height, a surfacing pass may create a new slope or leave untouched areas that look like a cutter problem.
The check before cutting
Inspect the spoilboard with a straightedge in both machine axes and on both diagonals. Clean the contact area before placing the blank. If the machine has a known spoilboard surfacing routine, use it before diagnosing the board itself.
A simple height map is useful. With the spindle safely clear, measure the gap between a straightedge and the spoilboard at several locations. You do not need laboratory precision. You need to know whether the support surface is flat enough for the thickness tolerance your part requires.
If the spoilboard is visibly uneven, fix that first. Shimming a warped board on top of a warped spoilboard makes the setup harder to reason about and may leave too little material for the final thickness.
Mistake 4: Surfacing too deep on the first pass
The first surfacing pass should prove the setup, not remove the entire problem at once. A deep pass increases cutting force, makes movement more likely, and can expose a shim or clamp that was safely below the expected surface.
Set the surfacing height from the highest point you can identify, then take a shallow test pass over a limited area or across the full blank with conservative engagement. The untouched regions show where the original high points are. If the cutter reaches the full intended area without the board shifting, make the next pass only as deep as needed.
The correct amount depends on cup depth, board thickness, cutter diameter, spindle rigidity, feed rate, and how the blank is supported. There is no universal surfacing depth that is safe for every warped board CNC setup.
The check after the test pass
Stop the spindle and inspect the newly cut surface while the board remains clamped. Look for:
- Areas that are still untouched, which identify lower regions.
- Fuzzy or torn grain, which can indicate a poor cutter, dull edge, or unsuitable feed direction.
- A sudden change in sound or finish, which may indicate the cutter reached a shim or clamp.
- A gap appearing under the board, which means the support arrangement has changed.
- A thickness result that leaves too little material for the intended part.
Measure the surfaced area with calipers or a depth gauge at several points. Do not judge flatness by appearance alone. A broad smooth finish can still follow a machine-bed error.
Mistake 5: Trusting the first face without checking the second
Surfacing one face gives you a reference face, not automatically a finished parallel board. If you remove the blank, flip it, and clamp it against an unsurfaced or unsupported face, the second operation can reproduce the original problem.
For a parallel blank, surface the first face while the board is supported, then use that new face against a known-flat support. If the board is still thin or flexible, add support under the finished face without introducing a new bow.
The target thickness determines how much material can be removed. Mark the intended minimum thickness on the edge or record it in the setup notes. It is easy to keep chasing the last low patch until the board is thinner than the design allows.
The check before flipping
Measure thickness at the corners and near the centre. Compare those readings with the drawing or CAM model. Confirm that the new face is stable on the support without rocking. If it rocks, find the cause before cutting the second face.
A short test cut in waste can confirm that the work coordinate and top-surface assumption survived the flip. This is cheaper than discovering an offset error in the finished area.
Choosing the least complicated setup
For most cupped solid-wood blanks, we would pick shims, clamps, and a conservative surfacing pass. Vacuum hold-down is useful when the board presents a broad, reasonably sealed contact area, but it does not remove the need to understand the board's shape. A vacuum can hold a bad geometry tightly enough to make the failure harder to see.
| Setup method | Support behaviour | Material removed | Main failure mode | Pre-cut check |
|---|---|---|---|---|
| Clamp the board flat | Forces the cup toward the support surface | Depends on the distorted position | Board springs back after release | Release clamps and watch for movement |
| Shim low areas and clamp | Supports the board without flattening the cup | High side is surfaced down | Shim compresses or sits in the toolpath | Press at multiple points and check for rocking |
| Vacuum hold-down | Holds broad contact areas with distributed force | High side can be surfaced if support is sound | Leaks or uneven contact lets the board move | Check seal, contact, and movement at the edges |
| Surface an uneven spoilboard and then the blank | Creates a flatter reference under the work | High side of each surface is removed | Bed error is transferred into the part | Sweep the bed and inspect the test pass |
The cheap method is often good enough here. You do not need a vacuum table, a probing package, or a new fixture to flatten one warped board. Stable shims and a hand check can solve the actual problem. An upgrade becomes useful when the same support issue repeats across many parts or when the work has too little material to tolerate trial cuts.
Frequently asked questions
Can I flatten a cupped board by clamping it overnight?
No, not reliably. Clamping may temporarily hold the board flat, but wood can return toward its cupped shape after release. If the board must stay flat, remove material from the high side while it is supported in its natural position, then establish a stable reference face.
How much should I surface from a warped board?
Remove only enough to reach the lowest required area, with a margin for the final thickness. Start with a shallow pass and inspect the untouched patches. The needed depth depends on the cup, the board thickness, and the accuracy of the support, so a measured test pass is safer than choosing a fixed number.
Do shims need to be glued to the spoilboard?
Not for a simple setup if they remain outside the toolpath and the clamps prevent movement. Gluing them can make cleanup harder and may create a height error. Secure or reposition a shim if hand pressure makes it slide, compress, or tilt the board.
The Boss Factory builds made-to-order work through Custom Woodworking and CNC & Precision Cutting; request a quote.
Related services
All services →Have a project in mind?
Tell us what you want built — we reply within 24–48 hours.